
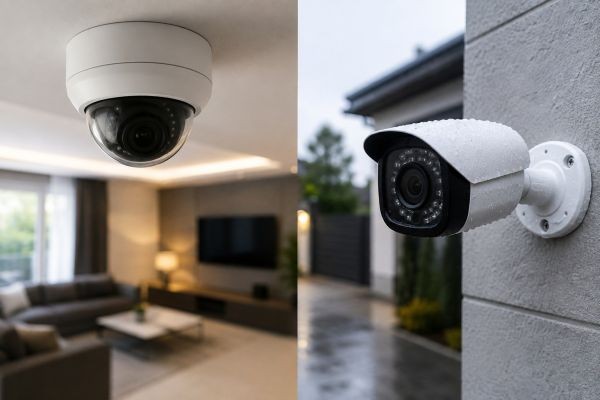
Installing security cameras is one of the most effective ways to improve the safety of residential and commercial properties. A surveillance system can help deter criminal activity, monitor daily operations, and provide valuable evidence when incidents occur. However, even the highest-quality camera cannot deliver reliable results if it is installed in the wrong location. Proper placement is just as important as selecting the right equipment.
Many property owners assume that installing more cameras automatically creates better security coverage. In reality, poor positioning often leaves blind spots, captures unusable footage, or reduces the effectiveness of important camera features. A carefully planned surveillance layout usually provides better protection than randomly placing cameras throughout a property.
When planning a surveillance system, many buyers compare the type of cctv camera [https://wiznet.ae/cctv-camera-types/] before deciding where each unit should be installed. Understanding common placement mistakes helps ensure every camera performs as intended while providing clear, consistent coverage of important areas.
This guide explains the most common security camera placement mistakes, why they reduce surveillance effectiveness, and how simple adjustments can improve overall coverage. Whether installing cameras in a home, office, retail store, warehouse, or industrial facility, avoiding these errors helps create a more dependable security system.
Why Camera Placement Matters
A security camera records only what falls within its field of view. If important areas remain outside that viewing angle, valuable footage may never be captured.
Good camera placement provides several benefits:
- Better visibility
- Fewer blind spots
- Improved identification of people and vehicles
- More effective incident investigations
- Better use of recording storage
Planning camera locations before installation often prevents costly adjustments later.
Mistake 1: Installing Cameras Too High
Many people believe mounting cameras as high as possible provides the widest coverage. While elevated positions increase visibility, they often reduce important facial detail.
When cameras are installed too high:
- Faces become difficult to identify.
- Vehicle number plates appear smaller.
- Important evidence may be lost.
- Viewing angles become less effective.
A balanced installation height allows cameras to capture both wide coverage and useful identification details.
Better Placement Tips
For most applications:
- Position cameras at practical viewing heights.
- Avoid unnecessary ceiling-level installations.
- Ensure faces remain visible.
- Test viewing angles before final mounting.
Mistake 2: Ignoring Blind Spots
Every property contains areas that cameras cannot naturally observe.
Common blind spots include:
- Building corners
- Behind large objects
- Stairwells
- Storage shelves
- Parking lot entrances
Failing to identify these areas creates security gaps that reduce overall protection.
Walking through the property before installation helps identify locations requiring additional coverage.
Mistake 3: Pointing Cameras Toward Bright Light
Strong lighting can significantly reduce image quality.
Common sources include:
- Direct sunlight
- Glass entrances
- Vehicle headlights
- Bright floodlights
- Large windows
Excessive light creates glare and dark shadows that make people difficult to recognise.
Position cameras so bright light remains behind the camera whenever possible.
Mistake 4: Covering Too Large an Area with One Camera
One camera cannot effectively monitor every part of a large property.
Attempting to monitor oversized areas often results in:
- Small faces
- Reduced image detail
- Poor evidence quality
- Missed activity
Using multiple properly positioned cameras usually provides much better coverage than relying on a single wide-angle device.
Mistake 5: Blocking the Camera View
Objects placed in front of cameras reduce visibility.
Common obstructions include:
- Trees
- Decorative plants
- Advertising signs
- Shelving
- Hanging decorations
Even small objects can block important portions of the camera's field of view.
Regular inspections help ensure cameras remain unobstructed throughout the year.
Mistake 6: Ignoring Night-Time Conditions
A camera that performs well during daylight may produce poor images after dark.
Night-time issues often include:
- Insufficient lighting
- Reflections
- Infrared glare
- Deep shadows
Testing cameras during both day and night helps confirm consistent image quality before relying on the system for security.
Mistake 7: Poor Entrance Coverage
Entrances are among the most important surveillance locations.
These areas should provide clear images of everyone entering or leaving the property.
Important entrances include:
- Front doors
- Rear exits
- Emergency doors
- Loading entrances
- Garage access points
Position cameras where faces can be captured clearly rather than recording only the tops of people's heads or distant silhouettes.
Mistake 8: Overlapping Cameras Without a Purpose
Some overlap between cameras is useful because it creates backup coverage if one camera is blocked or temporarily unavailable. However, placing several cameras where they all record the same scene wastes equipment, storage capacity, and installation costs.
Instead of excessive overlap:
- Cover separate viewing angles.
- Protect transition areas.
- Eliminate uncovered spaces.
- Balance wide and close-up views.
A planned layout provides more complete surveillance across the property.
Mistake 9: Forgetting Parking Areas and Walkways
Many security incidents begin before someone reaches the building. Parking spaces, footpaths, driveways, and access roads should be included in the surveillance plan.
Good coverage should monitor:
- Vehicle entry points
- Parking rows
- Pedestrian walkways
- Delivery areas
- External gates
Capturing movement before people enter the building improves investigations and helps identify suspicious activity earlier.
Mistake 10: Ignoring Camera Maintenance
Even correctly positioned cameras lose effectiveness without routine maintenance.
Regular inspections should include:
- Cleaning camera lenses
- Removing dust and debris
- Checking mounting brackets
- Confirming recording operation
- Reviewing image quality
Weather, insects, vibration, and dirt can gradually reduce image clarity if cameras are not maintained.
Mistake 11: Failing to Test Camera Angles
Many installations are completed without checking the recorded footage from each camera.
Before placing the system into daily operation:
- Review live images.
- Check recorded playback.
- Verify identification distances.
- Test both daytime and night-time performance.
- Confirm every important area remains visible.
Small adjustments after testing often produce significant improvements in coverage.
Creating a Better Surveillance Layout
Effective camera placement starts with understanding how people and vehicles move throughout the property. Instead of focusing only on walls or available mounting points, consider the locations where activity is most likely to occur.
A practical surveillance plan should:
- Cover all entrances and exits.
- Monitor valuable assets.
- Reduce blind spots.
- Provide overlapping coverage only where necessary.
- Consider future expansion.
Planning before installation usually delivers better long-term results than relocating cameras later.
Choosing Locations for Different Property Types
Every property has unique surveillance requirements.
Homes
Priority locations include:
- Front entrance
- Back garden
- Garage
- Driveway
- Side access
Offices
Recommended monitoring areas include:
- Reception
- Main corridors
- Meeting room entrances
- Storage areas
- Employee entrances
Retail Stores
Retail businesses should monitor:
- Customer entrances
- Checkout counters
- Product displays
- Stock rooms
- Delivery entrances
Warehouses
Warehouse surveillance should focus on:
- Loading bays
- Storage aisles
- Vehicle entrances
- Inventory areas
- Perimeter fencing
Adjusting camera placement to suit each property type improves both security and operational awareness.
Conclusion
A security camera system performs only as well as its installation plan. Poor placement can create blind spots, reduce image quality, waste recording resources, and leave important areas unprotected. By avoiding common mistakes such as mounting cameras too high, overlooking entrances, ignoring lighting conditions, and failing to test coverage, property owners can significantly improve surveillance performance.
Careful planning, regular maintenance, and thoughtful positioning allow every camera to contribute meaningful coverage. Whether protecting a home or a commercial facility, investing time in proper camera placement helps create a safer environment while making the most of the surveillance system.
Frequently Asked Questions
Why is camera placement more important than buying expensive equipment?
Even advanced cameras cannot record useful footage if important areas fall outside their field of view or if lighting and positioning reduce image quality.
How high should a security camera be installed?
The ideal height depends on the location, but cameras should generally capture clear facial details while still covering the intended area.
Should every security camera overlap with another?
Limited overlap is useful for backup coverage, but unnecessary overlap reduces efficiency and may leave other areas unprotected.
How often should security cameras be checked?
Cleaning lenses, reviewing footage, and confirming camera angles every few months helps maintain reliable performance. Outdoor cameras may require more frequent inspections because of weather and dust.
Can poor lighting affect surveillance footage?
Yes. Direct sunlight, strong reflections, and insufficient night lighting can reduce image quality. Testing cameras under different lighting conditions helps ensure consistent coverage throughout the day and night.