
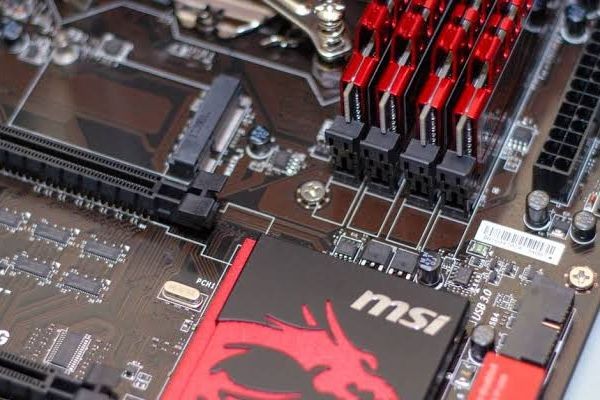
The motherboard is one of the most important components inside a computer. It connects the processor, RAM, storage drives, graphics card, power supply, and other hardware so they can work together. When something goes wrong with the motherboard or its connected components, your computer may fail to start, freeze, restart unexpectedly, or show other unusual behavior.
Fortunately, many motherboard problems can be identified with a systematic approach. You do not always need to replace the motherboard immediately. In many cases, the problem may come from loose cables, faulty RAM, incorrect BIOS settings, overheating, or another connected component.
Here are some useful motherboard troubleshooting tips that can help you identify and resolve common computer problems.
1. Check the Power Supply First
Before troubleshooting the motherboard itself, make sure the computer is receiving power. A weak or failing power supply can create symptoms that look like a motherboard failure.
Check whether the power cable is firmly connected to the wall outlet and the computer. If your desktop has a power switch on the back of the power supply, make sure it is turned on.
Inside the computer, check the main 24-pin motherboard power connector. Also inspect the CPU power connector near the processor socket. Both connections should be firmly attached.
If the computer shows no lights, no fan movement, and no response when you press the power button, the power supply or power connections should be among your first checks.
2. Look for Loose Connections
Loose hardware connections are a common cause of computer problems. Components can become slightly disconnected during transportation, cleaning, or hardware upgrades.
Turn off the computer and disconnect it from the power source before opening the case. Check the connections for:
-
RAM modules
-
Graphics card
-
SATA cables
-
Power cables
-
CPU power connector
-
Front-panel connectors
-
Storage drives
-
Cooling fans
Reconnect components carefully if necessary. Avoid forcing connectors into place because pins and sockets can be damaged.
3. Test the RAM
Memory problems can sometimes appear to be motherboard problems. Faulty or improperly installed RAM may prevent a computer from booting or cause random crashes.
Turn off the PC and remove the RAM modules. Check the slots for visible dust or debris. Then reinstall the memory firmly.
If your computer has multiple RAM sticks, try starting it with only one module installed. Test the modules individually and use the motherboard's recommended memory slot.
If the computer starts with one stick but not another, the memory module may be defective. If one particular slot consistently causes problems, the motherboard slot could be damaged.
4. Pay Attention to Beep Codes and Diagnostic Lights
Many modern motherboards provide diagnostic features that can help identify hardware problems. Depending on the motherboard model, you may see status LEDs labeled CPU, DRAM, VGA, or BOOT.
If one of these lights stays illuminated during startup, check the motherboard manual for its meaning.
Some systems also use beep codes to indicate hardware problems. The exact meaning varies by manufacturer and BIOS version.
These indicators can save considerable troubleshooting time because they can point you toward the component causing the startup failure.
5. Inspect the CPU and Cooling System
The processor works closely with the motherboard. If the CPU is overheating or its cooling system is not working correctly, the computer may shut down, freeze, or restart.
Check whether the CPU fan is spinning when the computer starts. Also make sure the CPU cooler is securely mounted.
Dust buildup can restrict airflow and increase temperatures. Carefully clean dust from the cooling system and case using appropriate equipment.
If the processor was recently installed or the cooler was removed, verify that the cooler is correctly mounted and that thermal paste was applied appropriately.
6. Reset the BIOS or UEFI Settings
Incorrect BIOS or UEFI settings can prevent a computer from starting normally. This can happen after changing memory settings, processor settings, boot options, or other hardware configurations.
One useful troubleshooting method is to restore the BIOS or UEFI settings to their default configuration.
Many motherboards provide a clear-CMOS jumper or button for this purpose. Some systems also allow the CMOS battery to be removed temporarily, although the manufacturer's instructions should be followed.
Resetting BIOS settings can remove problematic configuration changes without replacing hardware.
7. Check for Overheating
Excessive heat can cause instability and unexpected shutdowns. The motherboard itself also contains components that require proper airflow.
Make sure the case has adequate ventilation and that the fans are functioning properly. Remove accumulated dust from vents and cooling components.
Monitor CPU and system temperatures using reliable hardware-monitoring software. If temperatures are consistently higher than expected, investigate cooling problems before continuing with other troubleshooting steps.
Good airflow can improve system stability and extend the lifespan of internal components.
8. Remove Unnecessary Hardware
If the computer is failing to boot, try reducing the system to its essential components.
Disconnect unnecessary USB devices, additional storage drives, expansion cards, and other peripherals. Keep only the hardware required for basic startup, such as the motherboard, CPU, one RAM module, power supply, and display output.
If the computer starts after removing a particular component, reconnect devices one at a time. This process can help identify the hardware causing the problem.
9. Check the Graphics Card
A graphics card can cause symptoms that appear to be related to the motherboard. For example, the computer may power on but show no display.
If your system has a dedicated graphics card, make sure it is properly seated in its PCIe slot. Check its power connectors and verify that the monitor cable is connected to the correct video output.
If the processor supports integrated graphics, you can sometimes remove the dedicated graphics card and test the computer using the motherboard's video output.
This can help determine whether the graphics card or another component is responsible for the display problem.
10. Inspect the Motherboard for Physical Damage
Carefully inspect the motherboard for visible signs of damage. Look for:
-
Burn marks
-
Damaged connectors
-
Bent CPU socket pins
-
Cracked circuit boards
-
Swollen or leaking capacitors
-
Corrosion
-
Loose components
Never touch internal components while the computer is powered on unless you know exactly what you are doing and the procedure is safe.
Physical damage may require professional repair or motherboard replacement.
11. Test the CMOS Battery
A motherboard uses a small CMOS battery to maintain certain BIOS settings and the system clock when the computer is powered off.
A weak battery can cause incorrect date and time settings, BIOS configuration problems, or startup messages on some systems.
If the computer repeatedly loses BIOS settings after being powered off, replacing the CMOS battery may resolve the issue. Use the battery type recommended by the motherboard manufacturer.
12. Update the BIOS Carefully
A BIOS or UEFI update can improve hardware compatibility, fix bugs, and add support for newer processors or memory. However, updating firmware should be treated carefully.
First, confirm the exact motherboard model and revision. Download the appropriate firmware from the manufacturer's official support page and follow its instructions.
Do not interrupt power during a BIOS update. Installing incorrect firmware or losing power during the process can create serious problems.
If the computer is functioning normally and there is no clear reason to update the BIOS, avoid updating it simply because a newer version exists.
13. Test for Short Circuits
Sometimes a computer may fail to start because the motherboard is touching the case incorrectly or a misplaced screw is creating a short circuit.
Check that the motherboard is installed on the correct standoffs. No loose screws or metal objects should be underneath the motherboard.
If you recently built or upgraded the computer and it suddenly stopped working, carefully reviewing the installation can reveal the problem.
14. Use a Systematic Troubleshooting Process
One of the most important motherboard troubleshooting tips is to change only one thing at a time. Randomly replacing multiple components makes it difficult to identify the actual cause.
Start with simple checks such as power connections and cables. Then move to RAM, graphics, BIOS settings, cooling, and individual components.
Write down what happens after each test. For example, note whether the computer powers on, produces beep codes, displays diagnostic lights, or reaches the operating system.
This method helps narrow down the problem efficiently.
When Should You Seek Professional Help?
Not every motherboard problem should be repaired at home. If the motherboard has visible physical damage, damaged CPU socket pins, burned components, or suspected electrical faults, professional assistance may be the safest option.
You should also consider professional help if the computer repeatedly shuts down, fails to boot after basic troubleshooting, or has complicated hardware symptoms.
A qualified technician can test the power supply, motherboard, RAM, processor, graphics card, and other components using specialized equipment.
Final Thoughts
Motherboard problems can be frustrating because many different hardware failures can produce similar symptoms. However, a structured troubleshooting process can make diagnosis much easier.
Start by checking power connections, cables, RAM, diagnostic lights, cooling, and BIOS settings. Then test individual components and inspect the motherboard for visible damage. Avoid making several changes at once, and always follow manufacturer instructions when handling internal hardware.
These motherboard troubleshooting tips can help you identify common problems and determine whether a simple adjustment can restore your computer or whether professional repair is necessary.